
Table of Contents
床設置時にタイルレベリングクリップとスペーサーを使用するメリット
Tile leveling Clips and spacers are essential tools for ensuring a professional and precise floor tile installation. These small but mighty Accessories play a crucial role in achieving a flawless finish, whether you are a seasoned professional or a DIY enthusiast. In this article, we will explore the benefits of using tile leveling clips and spacers for floor installation.
One of the primary advantages of using tile leveling clips and spacers is their ability to create a level surface. Uneven Tiles can be a major eyesore and can compromise the overall look of your flooring. By using leveling clips and spacers, you can ensure that each tile is perfectly aligned with its neighbors, resulting in a smooth and uniform surface.
In addition to creating a level surface, tile leveling clips and spacers also help to prevent lippage. Lippage occurs when one tile is higher than its neighboring tiles, creating an uneven surface that is not only unsightly but also poses a tripping hazard. By using leveling clips and spacers, you can eliminate lippage and achieve a seamless finish that is both safe and visually appealing.
Another benefit of using tile leveling clips and spacers is their ability to speed up the installation process. Traditional methods of tile installation can be time-consuming and labor-intensive, requiring meticulous attention to detail to ensure a perfect finish. With leveling clips and spacers, you can significantly reduce the amount of time and effort required to install your floor tiles, allowing you to complete the job more quickly and efficiently.
Furthermore, tile leveling clips and spacers help to ensure consistent grout lines. Uneven spacing between tiles can result in irregular grout lines that detract from the overall aesthetic of your flooring. By using leveling clips and spacers, you can maintain consistent spacing between tiles, resulting in clean and uniform grout lines that enhance the Beauty of your floor.
Additionally, tile leveling clips and spacers are reusable, making them a cost-effective option for multiple tiling projects. Unlike disposable spacers that need to be discarded after use, leveling clips and spacers can be easily removed and reused, saving you money in the long run.
When it comes to choosing the right tile leveling clips and spacers for your project, there are a few key factors to consider. Make sure to select clips and spacers that are compatible with the size and thickness of your tiles, as well as the type of flooring material you are working with. Additionally, consider the spacing requirements of your specific project to ensure that you achieve the desired results.
In conclusion, tile leveling clips and spacers are essential tools for achieving a professional and precise floor tile installation. From creating a level surface to preventing lippage and speeding up the installation process, these small accessories offer a wide range of benefits that can help you achieve a flawless finish. Whether you are a seasoned professional or a DIY enthusiast, investing in quality tile leveling clips and spacers is a smart choice that will pay off in the long run.
プラスチックウェッジとセラミックスペーサーを使用してタイルレベリングシステムを設置する方法に関するステップバイステップガイド
タイルレベリングシステムは、床タイルをスムーズかつ均一に設置するために不可欠なツールです。これらのシステムは、接着剤が固まる間タイルを所定の位置に保持することにより、リップページ、つまりタイルの端が不均一になるのを防ぎます。タイルレベリングシステムを設置する一般的な方法の 1 つは、プラスチック製のウェッジとセラミック製のスペーサーを使用することです。このステップバイステップ ガイドでは、これらのツールを使用してタイル レベリング システムをインストールするプロセスを順を追って説明します。
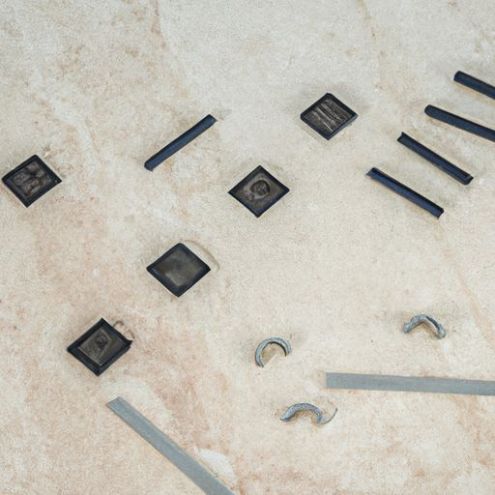
まず、インストールに必要なすべての材料を集めます。プラスチック製のウェッジ、セラミック製のスペーサー、タイルバージボードカバー、正方形のタイルレベリングクリップが必要になります。設置全体を完了するのに十分な各アイテムがあることを確認してください。
まず、床に希望のパターンでタイルをレイアウトします。レイアウトを決定したら、タイル水平クリップをタイルの端の下に配置します。これらのクリップは、タイルを所定の位置に保持し、タイルが互いに水平になるようにするのに役立ちます。
次に、プラスチック製のウェッジをタイル間の隙間に挿入します。これらのウェッジは、タイル間に均一な隙間を作り、設置プロセス中にタイルが移動するのを防ぐのに役立ちます。各タイルの周囲に均等にウェッジを挿入してください。
プラスチック製のウェッジを挿入した後、セラミック スペーサーをウェッジの上に置きます。これらのスペーサーは、タイル間の一定のギャップを維持し、タイルが適切に位置合わせされるようにするのに役立ちます。タイルの端に沿ってスペーサーを必ず一定の間隔で配置してください。
プラスチック製のウェッジとセラミックのスペーサーを所定の位置に配置したら、タイルバージボードカバーを使用して所定の位置に固定します。このカバーは、接着剤が固まる間、ウェッジとスペーサーを所定の位置に保持するのに役立ち、タイルが水平で均等な間隔を保てるようにします。
設置するタイルごとにこのプロセスを続け、プラスチック製のウェッジ、セラミック スペーサー、必要に応じてタイルレベリングクリップを使用します。各タイルが適切に位置合わせされ、周囲のタイルと水平になっていることを確認するために時間をかけてください。
すべてのタイルを所定の位置に配置し、レベリング システムを取り付けたら、メーカーの指示に従って接着剤を硬化させます。これにより、タイルが床にしっかりと接着され、設置完了後にずれたり動いたりすることはありません。
接着剤が硬化したら、タイル レベリング クリップ、プラスチック製のウェッジ、セラミック スペーサー、およびタイル バージ ボード カバーを慎重に取り外します。 。これらのツールを取り外す際は、タイルが所定の位置からずれる可能性があるため、タイルを邪魔しないように注意してください。
最後に、タイルが水平で均等な間隔で設置されていることを確認してください。タイルにグラウトを注入して設置を完了する前に、必要な調整を行ってください。プラスチック製のウェッジとセラミック スペーサーを使用すると、水平かつ均一なプロ仕様のタイルの設置を実現できます。
結論として、プラスチック製のウェッジとセラミック スペーサーを使用したタイル レベリング システムの設置は、簡単なプロセスであり、確実なタイルの設置に役立ちます。スムーズで均一なタイルの設置。このステップバイステップのガイドに従うことで、プロフェッショナルな結果を達成し、今後何年も長持ちする美しいタイル張りの床を作成することができます。