
Table of Contents
فوائد استخدام مشابك تسوية البلاط والفواصل لتثبيت الأرضيات
Tile leveling Clips and spacers are essential tools for ensuring a professional and precise floor tile installation. These small but mighty Accessories play a crucial role in achieving a flawless finish, whether you are a seasoned professional or a DIY enthusiast. In this article, we will explore the benefits of using tile leveling clips and spacers for floor installation.
One of the primary advantages of using tile leveling clips and spacers is their ability to create a level surface. Uneven Tiles can be a major eyesore and can compromise the overall look of your flooring. By using leveling clips and spacers, you can ensure that each tile is perfectly aligned with its neighbors, resulting in a smooth and uniform surface.
In addition to creating a level surface, tile leveling clips and spacers also help to prevent lippage. Lippage occurs when one tile is higher than its neighboring tiles, creating an uneven surface that is not only unsightly but also poses a tripping hazard. By using leveling clips and spacers, you can eliminate lippage and achieve a seamless finish that is both safe and visually appealing.
Another benefit of using tile leveling clips and spacers is their ability to speed up the installation process. Traditional methods of tile installation can be time-consuming and labor-intensive, requiring meticulous attention to detail to ensure a perfect finish. With leveling clips and spacers, you can significantly reduce the amount of time and effort required to install your floor tiles, allowing you to complete the job more quickly and efficiently.
Furthermore, tile leveling clips and spacers help to ensure consistent grout lines. Uneven spacing between tiles can result in irregular grout lines that detract from the overall aesthetic of your flooring. By using leveling clips and spacers, you can maintain consistent spacing between tiles, resulting in clean and uniform grout lines that enhance the Beauty of your floor.
Additionally, tile leveling clips and spacers are reusable, making them a cost-effective option for multiple tiling projects. Unlike disposable spacers that need to be discarded after use, leveling clips and spacers can be easily removed and reused, saving you money in the long run.
When it comes to choosing the right tile leveling clips and spacers for your project, there are a few key factors to consider. Make sure to select clips and spacers that are compatible with the size and thickness of your tiles, as well as the type of flooring material you are working with. Additionally, consider the spacing requirements of your specific project to ensure that you achieve the desired results.
In conclusion, tile leveling clips and spacers are essential tools for achieving a professional and precise floor tile installation. From creating a level surface to preventing lippage and speeding up the installation process, these small accessories offer a wide range of benefits that can help you achieve a flawless finish. Whether you are a seasoned professional or a DIY enthusiast, investing in quality tile leveling clips and spacers is a smart choice that will pay off in the long run.
دليل خطوة بخطوة حول كيفية تركيب أنظمة تسوية البلاط باستخدام الأوتاد البلاستيكية والفواصل الخزفية
تعد أنظمة تسوية البلاط أدوات أساسية لضمان التركيب السلس والمتساوي لبلاط الأرضيات. تساعد هذه الأنظمة على التخلص من الشفاه أو حواف البلاط غير المستوية، عن طريق تثبيت البلاط في مكانه أثناء تثبيت المادة اللاصقة. إحدى الطرق الشائعة لتثبيت أنظمة تسوية البلاط هي استخدام الأوتاد البلاستيكية والفواصل الخزفية. في هذا الدليل المفصّل خطوة بخطوة، سنرشدك خلال عملية تثبيت أنظمة تسوية البلاط باستخدام هذه الأدوات.
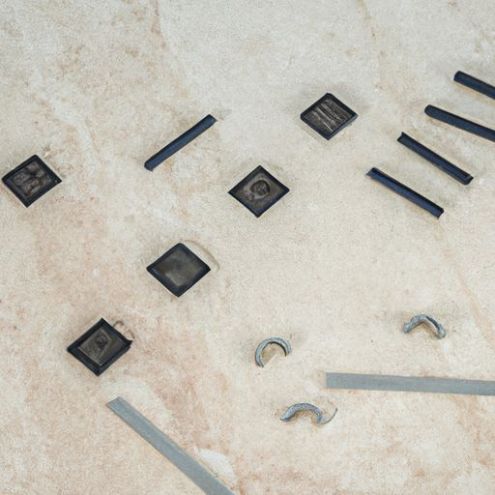
للبدء، اجمع كل المواد اللازمة للتثبيت. ستحتاج إلى أسافين بلاستيكية، وفواصل سيراميكية، وغطاء لوح صندل من البلاط، ومشابك تسوية مربعة للبلاط. تأكد من أن لديك ما يكفي من كل عنصر لإكمال التثبيت بالكامل.
ابدأ بوضع البلاط بالنمط المطلوب على الأرضية. بمجرد تحديد التخطيط، ضع مشابك تسوية البلاط أسفل حواف البلاط. ستساعد هذه المشابك على تثبيت البلاط في مكانه والتأكد من استوائه مع بعضها البعض.
بعد ذلك، أدخل الإسفين البلاستيكي في الفجوات بين البلاط. ستساعد هذه الأوتاد على إنشاء فجوة موحدة بين البلاط ومنعها من التحرك أثناء عملية التثبيت. تأكد من إدخال الأوتاد بالتساوي حول محيط كل بلاطة.
بعد إدخال الأوتاد البلاستيكية، ضع الفواصل الخزفية أعلى الأوتاد. ستساعد هذه الفواصل في الحفاظ على فجوة ثابتة بين البلاط والتأكد من محاذاتها بشكل صحيح. تأكد من وضع الفواصل على مسافات منتظمة على طول حواف البلاط.
بمجرد وضع الأوتاد البلاستيكية والفواصل الخزفية في مكانها، استخدم غطاء لوح صندل البلاط لتثبيتها في مكانها. سيساعد هذا الغطاء على تثبيت الأوتاد والفواصل في مكانها أثناء تركيب المواد اللاصقة، مما يضمن بقاء البلاط مستويًا ومتباعدًا بشكل متساوٍ.
استمر في هذه العملية لكل بلاطة في التثبيت، مع التأكد من إدخال الأوتاد البلاستيكية، والفواصل الخزفية، ومقاطع تسوية البلاط حسب الحاجة. خذ وقتك للتأكد من محاذاة كل بلاط بشكل صحيح ومستواه مع البلاط المحيط.
بمجرد وضع جميع البلاط في مكانه وتثبيت أنظمة التسوية، اسمح بضبط المادة اللاصقة وفقًا لتعليمات الشركة المصنعة. سيضمن ذلك ربط البلاط بشكل آمن بالأرضية ولن يتحرك أو يتحرك بمجرد اكتمال التثبيت.
بعد تثبيت المادة اللاصقة، قم بإزالة مشابك تسوية البلاط والأوتاد البلاستيكية والفواصل الخزفية وغطاء لوح بارجة البلاط بعناية . احرص على عدم إزعاج البلاط أثناء إزالة هذه الأدوات، لأن ذلك قد يؤدي إلى تحركها من مكانها.
وأخيرًا، قم بفحص التثبيت للتأكد من أن البلاط مستوي ومتباعد بشكل متساوٍ. قم بإجراء أي تعديلات ضرورية قبل حشو البلاط لإكمال التثبيت. باستخدام الأوتاد البلاستيكية والفواصل الخزفية، يمكنك تحقيق تركيب بلاط ذو مظهر احترافي يكون مستويًا وموحدًا.
في الختام، يعد تركيب أنظمة تسوية البلاط باستخدام الأوتاد البلاستيكية والفواصل الخزفية عملية مباشرة يمكن أن تساعد في ضمان تركيب سلس ومتساوي للبلاط. باتباع هذا الدليل التفصيلي، يمكنك تحقيق نتائج احترافية وإنشاء أرضية مبلطة جميلة تدوم لسنوات قادمة.