
Table of Contents
Benefits of Using Waterproof Backsplash in Your RV Kitchen
 When it comes to designing and decorating your RV kitchen, there are many factors to consider. One important element that often gets overlooked is the backsplash. A backsplash not only adds a decorative touch to your kitchen but also serves a practical purpose by protecting your walls from splashes and spills. In an RV kitchen, where space is limited and messes are inevitable, a waterproof backsplash is a smart choice.
One of the main benefits of using a waterproof backsplash in your RV kitchen is its durability. Traditional backsplashes made of materials like ceramic or glass can be prone to cracking or chipping, especially in a moving vehicle. A waterproof backsplash, on the other hand, is made of durable materials that can withstand the rigors of life on the road. Whether you’re driving on bumpy roads or cooking up a storm in a small space, a waterproof backsplash will hold up to the challenge.
Another advantage of a waterproof backsplash is its easy maintenance. In an RV kitchen, where space is at a premium, keeping things clean and organized is essential. A waterproof backsplash is easy to clean with just a damp Cloth or Sponge, making it a low-maintenance option for busy RVers. Unlike traditional backsplashes that require special Cleaners or sealants, a waterproof backsplash can be wiped Down quickly and easily, saving you time and effort.
In addition to its durability and easy maintenance, a waterproof backsplash is also a stylish choice for your RV kitchen. With a wide range of colors and patterns to choose from, you can find a waterproof backsplash that complements your RV’s decor and reflects your personal style. Whether you prefer a sleek, modern look or a more traditional design, there is a waterproof backsplash to suit your taste.
One popular option for a waterproof backsplash in an RV kitchen is smart peel and stick tile. These Tiles are designed to be easy to install, requiring no special tools or skills. Simply peel off the backing and stick the tiles to your wall, creating a seamless and waterproof surface that looks like real tile. Smart peel and stick tile is a great DIY project for RVers who want to update their kitchen without a lot of hassle.
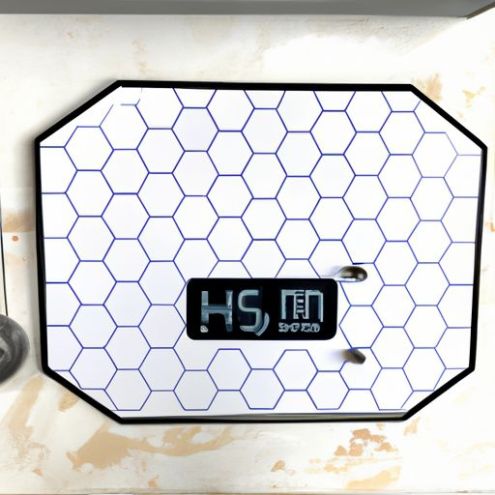
One of the most popular styles of smart peel and stick tile for RV kitchens is white hexagon. This classic design adds a touch of elegance to your space while providing a waterproof barrier against spills and splashes. The white hexagon pattern is versatile and timeless, making it a great choice for RVers who want a clean and modern look in their kitchen.
In conclusion, using a waterproof backsplash in your RV kitchen offers many benefits, including durability, easy maintenance, and style. Smart peel and stick tile, such as white hexagon, is a popular choice for RVers looking to update their kitchen with a waterproof backsplash that is both functional and fashionable. Whether you’re a full-time RVer or a weekend warrior, a waterproof backsplash is a smart investment that will enhance the look and functionality of your kitchen on the road.
How to Install Smart Peel and Stick Tile for a Large Display White Hexagon Backsplash in Your RV Kitchen – Easy DIY Guide
When it comes to updating the look of your RV kitchen, installing a new backsplash can make a big impact. Not only does it add a touch of style and personality to your space, but it also serves a practical purpose by protecting your walls from splashes and spills. If you’re looking for a quick and easy way to give your RV kitchen a fresh new look, consider installing smart peel and stick tile.
One popular option for a sleek and modern backsplash is a large display white hexagon tile. This classic design adds a touch of elegance to any kitchen and can easily be customized to fit your personal style. The best part? You can achieve this look with smart peel and stick tile, making the installation process a breeze.
To get started, gather your materials. You’ll need smart peel and stick tile in a large display white hexagon pattern, a Utility Knife, a straight edge, a pencil, and a measuring tape. Before you begin, make sure your walls are clean and dry to ensure a strong bond between the tile and the surface.
Start by measuring the area where you want to install the backsplash. Use a pencil and straight edge to mark off the dimensions on the wall. This will serve as a guide for where to place the tile. Next, cut the smart peel and stick tile to fit the space using a utility knife. Be sure to measure twice and cut once to ensure a perfect fit.
Once you have your tiles cut to size, peel off the backing and carefully place them on the wall, starting from the bottom and working your way up. Use a straight edge to press the tiles firmly into place, ensuring a secure bond. Continue this process until the entire backsplash is covered with smart peel and stick tile.
One of the benefits of using smart peel and stick tile is that it is waterproof, making it ideal for use in a kitchen where spills and splashes are common. This feature not only makes cleaning up a breeze but also ensures that your backsplash will stay looking fresh and new for years to come.
In addition to being waterproof, smart peel and stick tile is also easy to remove and reposition, making it a great option for renters or those who like to change up their decor frequently. If you ever decide to update your backsplash in the future, simply peel off the tiles and start fresh with a new design.
Overall, installing smart peel and stick tile for a large display white hexagon backsplash in your RV kitchen is a simple and cost-effective way to give your space a fresh new look. With its easy installation process, waterproof properties, and versatility, smart peel and stick tile is a smart choice for any DIY enthusiast looking to update their kitchen. So go on, give your RV kitchen a stylish upgrade with smart peel and stick tile today.