
Table of Contents
Benefits of Using Tile Leveling Clips and Spacers for Floor Installation
Tile leveling clips and spacers are essential tools for ensuring a professional and precise floor tile installation. These small but mighty Accessories play a crucial role in achieving a flawless finish, whether you are a seasoned professional or a DIY enthusiast. In this article, we will explore the benefits of using tile leveling clips and spacers for floor installation.
One of the primary advantages of using tile leveling clips and spacers is their ability to create a level surface. Uneven Tiles can be a major eyesore and can compromise the overall look of your flooring. By using leveling clips and spacers, you can ensure that each tile is perfectly aligned with its neighbors, resulting in a smooth and uniform surface.
In addition to creating a level surface, tile leveling clips and spacers also help to prevent lippage. Lippage occurs when one tile is higher than its neighboring tiles, creating an uneven surface that is not only unsightly but also poses a tripping hazard. By using leveling clips and spacers, you can eliminate lippage and achieve a seamless finish that is both safe and visually appealing.
Another benefit of using tile leveling clips and spacers is their ability to speed up the installation process. Traditional methods of tile installation can be time-consuming and labor-intensive, requiring meticulous attention to detail to ensure a perfect finish. With leveling clips and spacers, you can significantly reduce the amount of time and effort required to install your floor tiles, allowing you to complete the job more quickly and efficiently.
Furthermore, tile leveling clips and spacers help to ensure consistent grout lines. Uneven spacing between tiles can result in irregular grout lines that detract from the overall aesthetic of your flooring. By using leveling clips and spacers, you can maintain consistent spacing between tiles, resulting in clean and uniform grout lines that enhance the Beauty of your floor.
Additionally, tile leveling clips and spacers are reusable, making them a cost-effective option for multiple tiling projects. Unlike disposable spacers that need to be discarded after use, leveling clips and spacers can be easily removed and reused, saving you money in the long run.
When it comes to choosing the right tile leveling clips and spacers for your project, there are a few key factors to consider. Make sure to select clips and spacers that are compatible with the size and thickness of your tiles, as well as the type of flooring material you are working with. Additionally, consider the spacing requirements of your specific project to ensure that you achieve the desired results.
In conclusion, tile leveling clips and spacers are essential tools for achieving a professional and precise floor tile installation. From creating a level surface to preventing lippage and speeding up the installation process, these small accessories offer a wide range of benefits that can help you achieve a flawless finish. Whether you are a seasoned professional or a DIY enthusiast, investing in quality tile leveling clips and spacers is a smart choice that will pay off in the long run.
Step-by-Step Guide on How to Install Tile Levelling Systems Using Plastic Wedges and Ceramic Spacers
Tile leveling systems are essential tools for ensuring a smooth and even installation of floor tiles. These systems help to eliminate lippage, or uneven tile edges, by holding the tiles in place while the adhesive sets. One popular method for installing tile leveling systems is by using plastic wedges and ceramic spacers. In this step-by-step guide, we will walk you through the process of installing tile leveling systems using these tools.
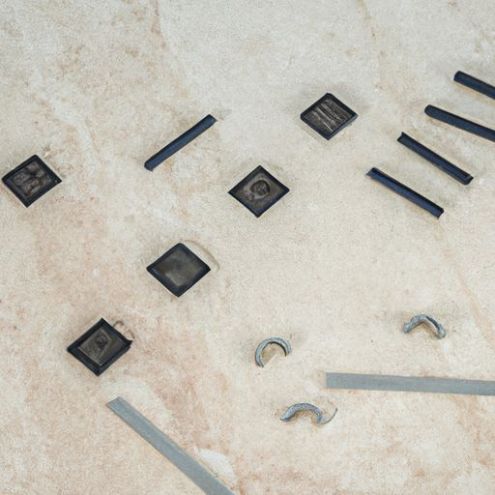
To begin, gather all the necessary materials for the installation. You will need plastic wedges, ceramic spacers, a tile barge board cover, and square tile leveling clips. Make sure that you have enough of each item to complete the entire installation.
Start by laying out your tiles in the desired pattern on the floor. Once you have determined the layout, place the tile leveling clips underneath the edges of the tiles. These clips will help to hold the tiles in place and ensure that they are level with each other.
Next, insert the plastic wedges into the gaps between the tiles. These wedges will help to create a uniform gap between the tiles and prevent them from shifting during the installation process. Make sure to insert the wedges evenly around the perimeter of each tile.
After inserting the plastic wedges, place the ceramic spacers on top of the wedges. These spacers will help to maintain a consistent gap between the tiles and ensure that they are properly aligned. Make sure to place the spacers at regular intervals along the edges of the tiles.
Once the plastic wedges and ceramic spacers are in place, use the tile barge board cover to secure them in position. This cover will help to hold the wedges and spacers in place while the adhesive sets, ensuring that the tiles remain level and evenly spaced.
Continue this process for each tile in the installation, making sure to insert the plastic wedges, ceramic spacers, and tile leveling clips as needed. Take your time to ensure that each tile is properly aligned and level with the surrounding tiles.
Once all the tiles are in place and the leveling systems are installed, allow the adhesive to set according to the manufacturer’s instructions. This will ensure that the tiles are securely bonded to the floor and will not shift or move once the installation is complete.
After the adhesive has set, carefully remove the tile leveling clips, plastic wedges, ceramic spacers, and tile barge board cover. Take care not to disturb the tiles as you remove these tools, as this could cause them to shift out of place.
 Finally, inspect the installation to ensure that the tiles are level and evenly spaced. Make any necessary adjustments before grouting the tiles to complete the installation. With the use of plastic wedges and ceramic spacers, you can achieve a professional-looking tile installation that is both level and uniform.
In conclusion, installing tile leveling systems using plastic wedges and ceramic spacers is a straightforward process that can help to ensure a smooth and even tile installation. By following this step-by-step guide, you can achieve professional results and create a beautiful tiled floor that will last for years to come.